Oracle Cloud Instance - Ports opening (Oracle Linux and Ubuntu)
Info about this guide:
In this guide, I’ll only cover the ports management, both on OCI console and on the server itself. Focus will be held for BlueMap access, not your minecraft server or the way to set that up.
- Step 1 : Open the ports on your Oracle Instance (web console)
- Step 2a - Oracle Linux 8
- Step 2b - Ubuntu
- Step 3 - Enjoy!
Step 1 : Open the ports on your Oracle Instance (web console)
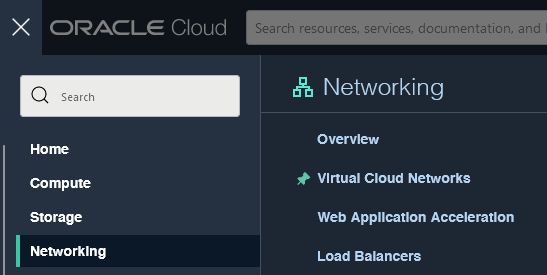
Go to your console (Oracle Cloud Login page), next in the menu, go to “Networking” and then select “Virtual Cloud Networks”
On the new page, you should see your virtual network (in the form of “vcn-….”, by default), select it.
After that, select your subnet and then, the “Default Security List” (only one of each).
You should get a page similar to this screenshot:

Select “Add Ingress Rules” The first rule we add is for accessing BlueMap:
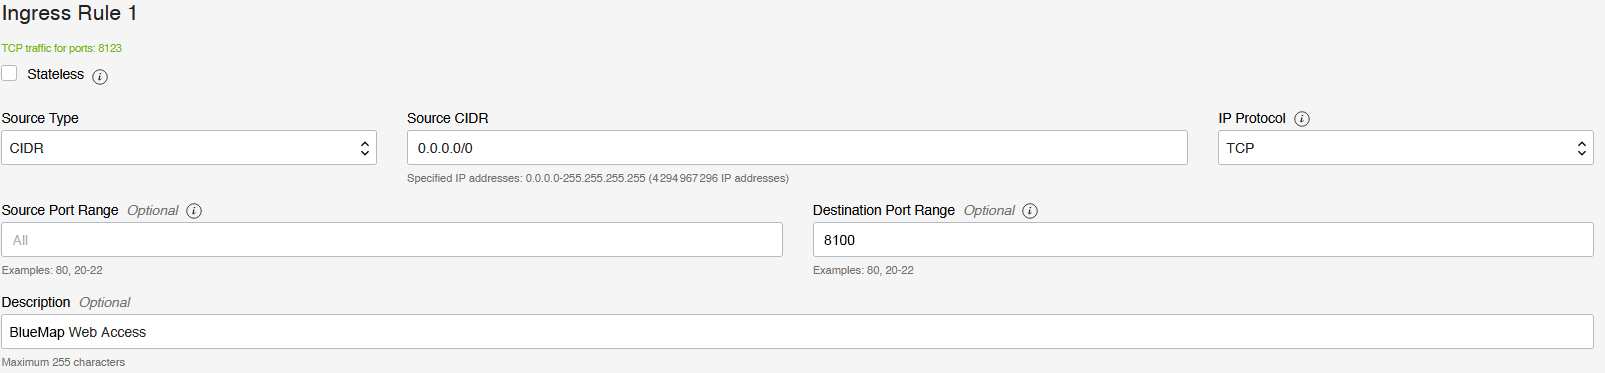
So, as the source, we set it to ANY, so: 0.0.0.0/0
For the port, if you left the default one: 8100
The protocol is TCP (standard for HTTP services)
Then, we also need to allow the access to our Minecraft server, if not done yet (depends on which version you installed and/or mods to allow either clients to connect to your Java server)
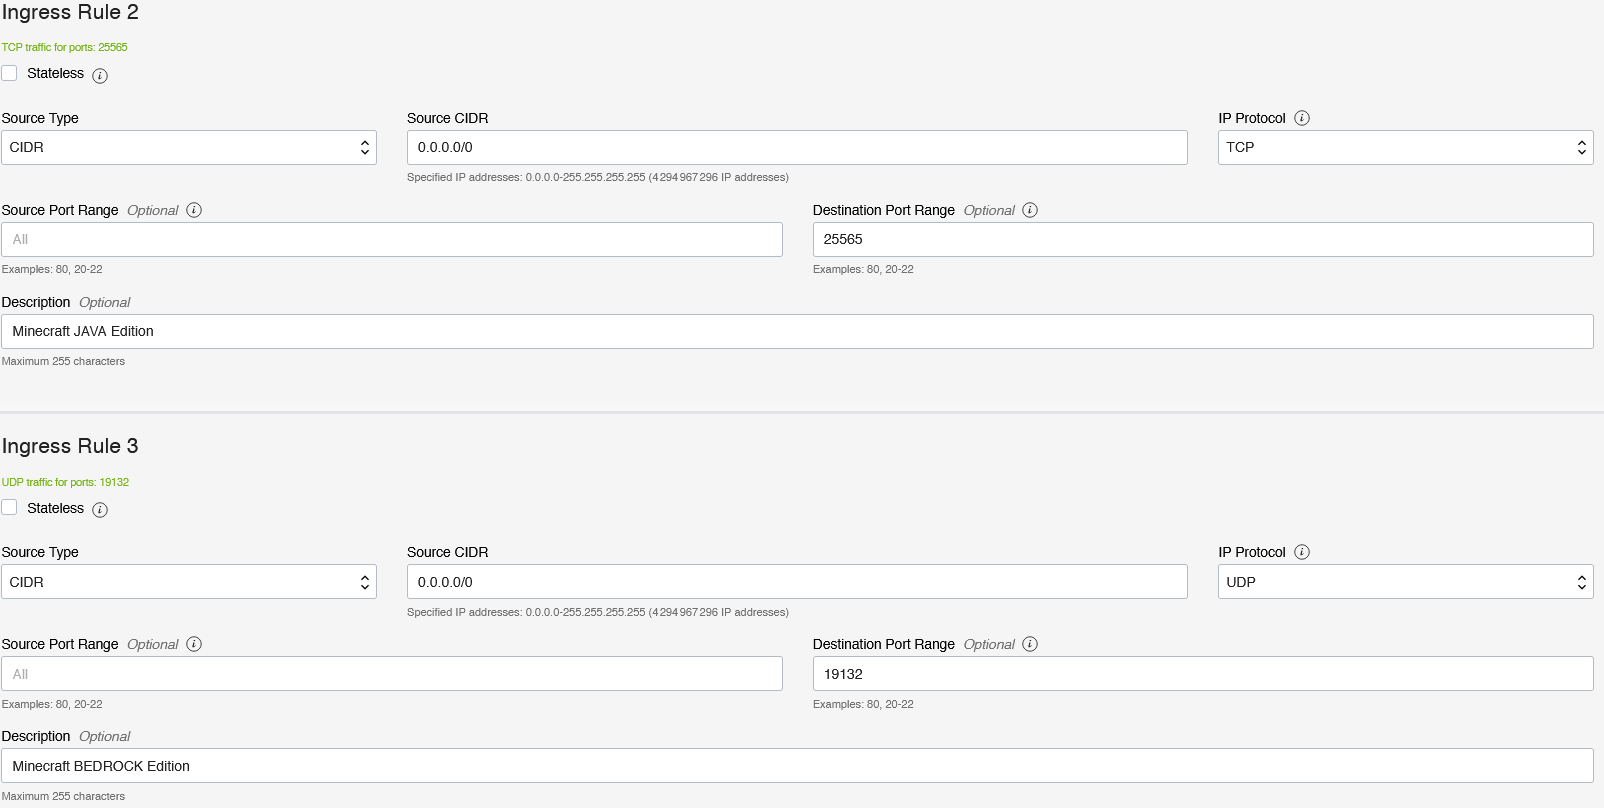
For all those settings, adapt the destination ports to your needs.
After that, you should have some rules like those ones:

Now, a quick explanations here on what we did above:
“Stateless” ==> We do not want to manually create Egress rules, so we do not check this box and let the system handle the connections. If we had selected it, we would have needed to create a rule to allow ANY destination to get out of our server from the BlueMap web server port (to any destination port (as this is a random port, never the same).
“Source CIDR” ==> We want to get ANY outside connection to connect to our server, so we specify in CIDR notation, “all”, which is 0.0.0.0/0
“Source Port Range” ==> Is defined by the client host (random), so we let this box empty.
“Destination Port Range” ==> For this one, we set to the value of the destination service, in this case for example, the BlueMap port 8100.
Step 2a - Oracle Linux 8
The official guide on how to open your ports can be found here: https://docs.oracle.com/en/operating-systems/oracle-linux/8/firewall/firewall-ConfiguringaPacketFilteringFirewall.html#ol-firewall
But, here is the summary on what you have to do for your Oracle Linux setup:
Info:
All those commands are preceded with “sudo”. If you are already using the root account, you can remove it from the command!
First, check that firewall-cmd command is available on your system. You can check its presence with this command:
sudo firewall-cmd --version
If you don’t get a version output or simply “Command not found”, do the following commands to install it:
sudo dnf install firewalld
sudo systemctl enable firewalld
The second command ensure it will start on boot.
Then, you can simply add the needed ports to the rules list, for BlueMap, it’s by default 8100/tcp, so the command will look like this:
sudo firewall-cmd --permanent --zone=public --add-port=8100/tcp
As a final command, just run this to reload the firewall configuration with your changes
sudo firewall-cmd --reload
Step 2b - Ubuntu
As per Oracle’s Best Practices, you can follow the steps explained here: https://blogs.oracle.com/developers/post/enabling-network-traffic-to-ubuntu-images-in-oracle-cloud-infrastructure ; At the chapter “Host Firewall” or just read the quick steps below.
The method used there is to edit a file named /etc/iptables/rules.v4 and add your own rules in there.
Your initial file should look like this (the start of it at least):
# CLOUD_IMG: This file was created/modified by the Cloud Image build process
# iptables configuration for Oracle Cloud Infrastructure

# See the Oracle-Provided Images section in the Oracle Cloud Infrastructure
# documentation for security impact of modifying or removing these rule

*filter
:INPUT ACCEPT [0:0]
:FORWARD ACCEPT [0:0]
:OUTPUT ACCEPT [463:49013]
:InstanceServices - [0:0]
-A INPUT -m state --state RELATED,ESTABLISHED -j ACCEPT
-A INPUT -p icmp -j ACCEPT
-A INPUT -i lo -j ACCEPT
-A INPUT -p tcp -m state --state NEW -m tcp --dport 22 -j ACCEPT
-A INPUT -p udp --sport 123 -j ACCEPT
-A [...]
-A INPUT -j REJECT --reject-with icmp-host-prohibited
-A FORWARD -j REJECT --reject-with icmp-host-prohibited
[...]
-A InstanceServices [...]
COMMIT
You can then insert a new line, for BlueMap (but before the global REJECT rules!), this would look like this:
# CLOUD_IMG: This file was created/modified by the Cloud Image build process
# iptables configuration for Oracle Cloud Infrastructure

# See the Oracle-Provided Images section in the Oracle Cloud Infrastructure
# documentation for security impact of modifying or removing these rule

*filter
:INPUT ACCEPT [0:0]
:FORWARD ACCEPT [0:0]
:OUTPUT ACCEPT [463:49013]
:InstanceServices - [0:0]
-A INPUT -m state --state RELATED,ESTABLISHED -j ACCEPT
-A INPUT -p icmp -j ACCEPT
-A INPUT -i lo -j ACCEPT
-A INPUT -p tcp -m state --state NEW -m tcp --dport 22 -j ACCEPT
-A INPUT -p udp --sport 123 -j ACCEPT
-A INPUT -p tcp -m state --state NEW -m tcp --dport 8100 -j ACCEPT
-A [...]
-A INPUT -j REJECT --reject-with icmp-host-prohibited
-A FORWARD -j REJECT --reject-with icmp-host-prohibited
[...]
-A InstanceServices [...]
COMMIT
Be careful while adding lines in this file! You have to put your new lines BEFORE the “REJECT” rules (“-A INPUT -j REJECT –reject-with icmp-host-prohibited”). By not following this, the firewall could apply, by default, the “deny” rule (sometime this could work, but just not everytime).
Now, save the file and after that, you can either choose to reboot the server or run the following command:
If you are NOT using the root privileges:
sudo iptables-restore < /etc/iptables/rules.v4
If you are using the root privileges:
iptables-restore < /etc/iptables/rules.v4
Step 3 - Enjoy!
If you did arrive there, you should be able to access your web map with the address: http://Your_Server_Public_IP:Your_BlueMap_Web_Port (port, by default is 8100).
If you want to use a custom DNS and/or HTTPS, you can find some information in the Webserver Wiki (Reverse proxy BlueMap)